Order Free Samples CLICK HERE
This article is your one stop shop for all things brick slips! Here you’ll find the answer to any questions you may have had on the subject. You’ll learn about the stages of brick slip production, installation and after care.
This seems like the most logical start for this blog. A brick slip simply put is the thinly cut face of a real brick. It is then applied to a wall or other surface to mimic the appearance of real masonry work. They are also often referred to as a brick veneer or a brick tiles. Despite the different names however, they all refer to the same product. In the UK, brick slips usually comply to the standard 215mm x 65mm x 20mm nominal measurements. You do however get the occasional brick slip, such as our Rosewood, that is different to this.
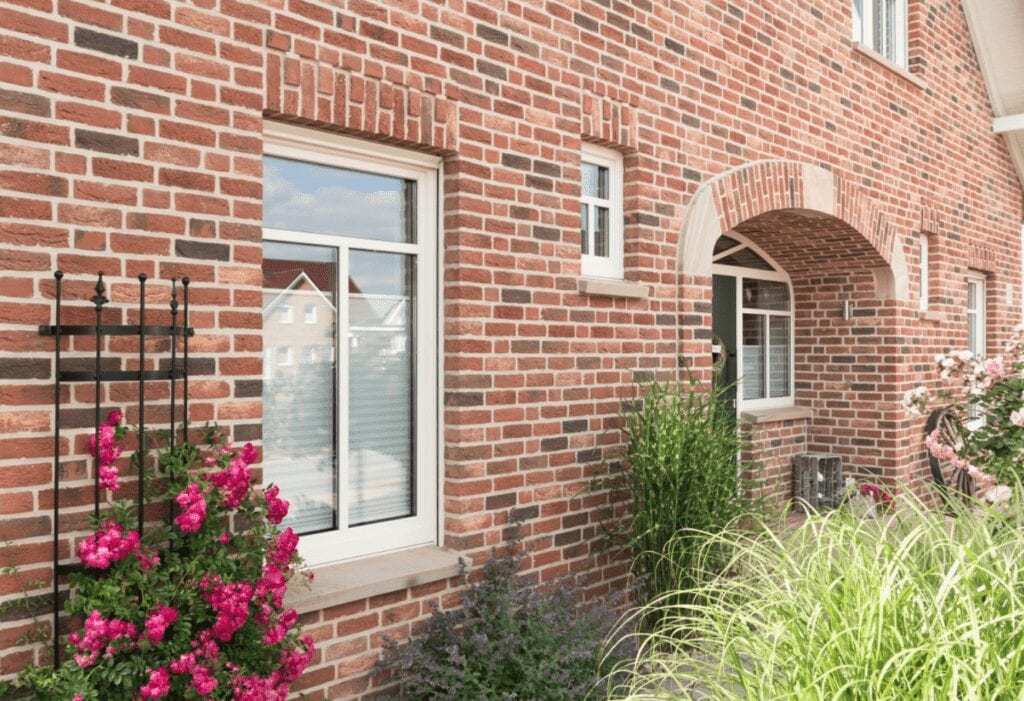
Brick slips are an extremely versatile and durable project. This allows for them to be used on both internal and external projects. Because they are cut from the face of genuine bricks, you should face no problems should you choose to externally install your brick slips. This is a great alternative to help keep the exterior of your house looking fresh. Exterior brick slips are also a very cost effective solution for your home renovation. Furthermore, very little post installation maintenance is required. However, your brick slips will be sure to withstand the test of time due to the sheer durability of the product!
We pride ourselves on offering our customers the best product and service possible. This is the precise reason we only offer brick slips made from genuine clay bricks! Alternatively, we could offer brick slips made from cheaper material such as acrylic. However, acrylic brick slips do not offer the same genuine brick wall feeling you get from clay brick slips. To make our brick slips we cut the two faces off of a real brick. This then leaves you with your two slips. No two bricks are the same nor are two of our slips. Furthermore our brick slips are handmade. This helps to keep them from all becoming uniform which takes away from the real brick wall illusion.
Installing brick slips is far from rocket science. If you follow our installation guide to a tee, I am confident that you will be able to install the your brickslips yourself. The key to it is the preparation and knowing your limits. It’s of paramount importance that your surface is dry and clear of any debris before you begin installing. This gives your adhesive a good surface to work with. It also eliminates the risk of your slips falling off the wall. In terms of knowing your limits, the adhesive we supply is rapid setting. This means if you prepare too much at once, you risk it setting before you even get the chance to use it to apply your brickslips to your wall. As long as you take your time with the whole process, I am sure you’ll find installing your brickslips to be a walk in the park!
Of course, you are free to decide whether or not you want to provide your brickslips with any aftercare at all. However, we would highly recommend it especially in areas that will experience high traffic. This includes areas such as your kitchen, bathroom and external projects. One of the great things about brick slips is how long lasting they are, but if you choose not to provide them with proper aftercare then you may find they don’t last as long as you’d like. Unfortunately, brick slips are not immune to attract dust and dirt and if you leave your slips unsealed these can be quite difficult to clean off. Especially on slips such as our Euphoria as if you allow too much dust to gather you may find yourself brushing away some of the gold dust that is part of the character of the brick.
The most important part of your brick slip aftercare is to seal your brick slips. Before sealing your slips, it’s very important that you’ve given the adhesive and mortar time to cure. As our brickslips are made from genuine clay you will also need to give any salt time to present itself. If you do not give them time before sealing, you may be left with stains and salt ‘locked’ into the surface of your brick once you have sealed them. Once you’re sure your brick slips are looking exactly how you want them to feel free to seal them. For this, we recommend our USP-100 brick slip sealer that is supplied courtesy of TBS Cladding Solutions. It’s the market leader in terms of brick slip aftercare. This sealer resists moss and lichen as well as preventing surface deterioration due to repeated freeze/thaw cycles making it perfect for exterior projects!
Although we would definitely recommend it, using pointing mortar on your brick slips isn’t absolutely necessary. However, It definitely adds to the illusion if you are trying to give off the impression of a real brick wall. Mortar is used in building projects using real bricks as an adhesive to hold the bricks together. When you are installing brick slips, you have already stuck your slips to the wall meaning the pointing mortar is being used for aesthetics. We have seen some great projects completed without the use of mortar. So if you feel like ditching the mortar for your next project, go for it. We’d love to see the finished results so please don’t forget to send them in!
You would be forgiven for thinking that brick slip pointing mortar is the same as grout. After all, once the mortar has been applied and dried, the appearance is indistinguishable from that of tile grout. However, it is very important that you don’t treat the mortar as grout. If you try and apply the mortar in the same way you apply grout you will ruin your brick slips. Grout is a highly viscous substance compared to mortar which is significantly thicker. Because of this if you spread mortar over your brick slips in the same way you would with your tiles it will leave nasty stains on your brick slips that can be quite difficult to remove. As brick slips are often referred to as brick tiles you may hear the mortar be referred to as grout. However, it is absolutely imperative that you know the difference!
Pour half of the bag of SlipFix adhesive into a mixing bucket. Then slowly add approximately two and a half litres of cold clean water making to sure to mix periodically. You should continue to mix until you have a smooth and consistent mixture. It is recommended that you use a a mixing paddle attachment in order to achieve this easily. This should take around three minutes however you can take as much time as you need. Once the SlipFix adhesive is ready, spread it over a small area of your wall. From here, you take your slip and press firmly and evenly into the adhesive. Our SlipFix adhesive is rapid setting. Meaning it will need to be applied within 25 minutes so ensure you only mix what you will be able to apply within this time frame.
As it is a cement based adhesive, SlipFix is suitable to be used on most projects. The cement base also makes it cheaper per square meter than most other alternatives. For most people, cement based adhesives are the way to go however, this is not always the case. If you are installing brick slips to a non-porous surface you are probably better off using an epoxy based adhesive. This is opposed to a cement based adhesive. This is because, cement based adhesives rely on small irregularities and pores on the surface and use these to form a strong bond. Non-porous surfaces such as porcelain present a closed smooth surface where the bonding effect may be difficult.
Before you start to use your SlipFix adhesive there are a few things you’ll want to make sure of first. First you’ll want to make the surface you want to apply your SlipFix adhesive too, is dry, clean and in suitable condition to apply adhesive to (.i.e. not falling apart). If you don’t check for these things, you risk your slips ‘floating’ down the wall. Whilst watching brick slips ‘float’ may sound like fun, I can assure you it is not. In fact, after spending time and money to create your perfect brick slip project, seeing your brick slips ‘float’ down your wall is the last thing you’ll want to see. So make sure you use your SlipFix adhesive correctly!
Our sales team can help you with your choice of brick slip and can also assist with working the quantities that you require for your project out also, including Slip-Fix adhesive and Slip-Point mortar. Feel free to use our brick slip calculator on our site or, for more complex projects, please send your drawings over to sales@slipsfromstock.com and a member of the estimating team will respond within 24 hours. For large trade customers, we recommend visiting TBS Cladding Solutions. We want to thank you for choosing Slips From Stock as your brick slip supplier! So once your slips have been installed post them on Facebook or Instagram and we’ll send you an Amazon voucher! Our team works tirelessly around the clock. We are experts on all things brick slips and also offer a FREE brick slip matching service. Simply email us at sales@slipsfromstock.com or call us at 01889 227183.